For all the Valve fans out there here’s how to assemble a Portal Christmas tree. Portal is set in the same world as Half-Life and originally came packaged as part of The Orange Box, which contained other Valve game like Half-Life 2. Despite its short length, the game’s unique portal mechanic and addictive gameplay made it the highlight of The Orange Box for many.
The game’s storyline hinted at a lot of things, including the backstory of heroine Chell and villainous A.I. GLaDOS. The acclaim that greeted the original title quickly led to Portal 2, which was larger in scope and featured vocal performances by Stephen Merchant and J.K. Simmons (Whiplash). The sequel also received acclaim but sadly the future of the series is unknown. Valve has more or less stepped away from games development to focus on Steam, meaning Portal 3 – alongside Half-Life 3 and Left 4 Dead 3 – may not happen.
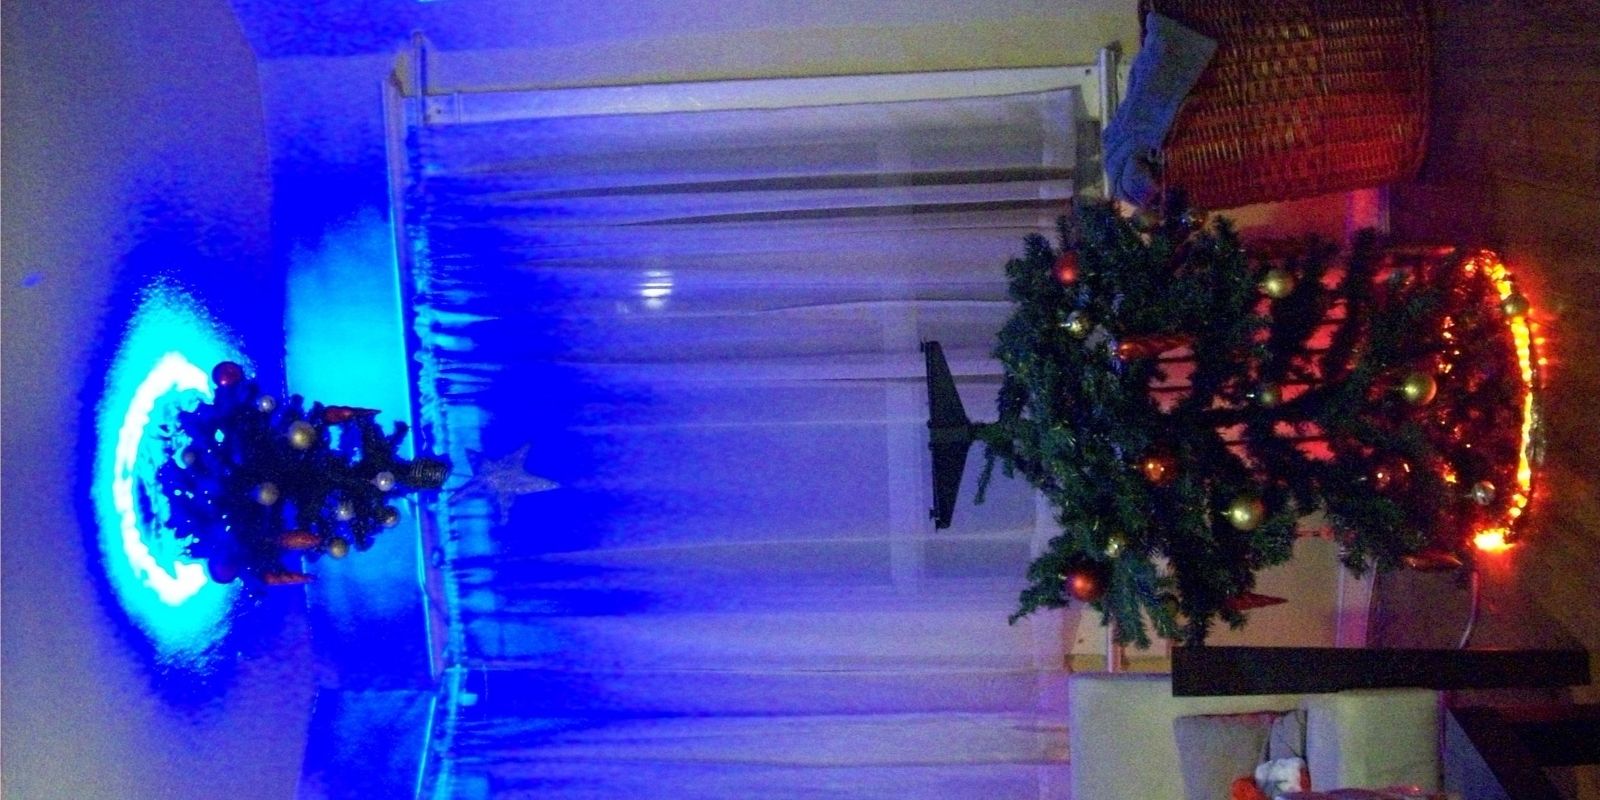
The mechanics in Portal revolve around the Aperture Science Handheld Portal Device – AKA portal gun – which creates two distinct portals on flat surfaces. Chell has to use this feature to navigate the various obstacles GLaDOS puts in front for her. This mechanic also creates some fun visuals and in 2011 some fans scored a viral post by creating a Portal Christmas tree. The illusion of this tree is that one end of a tree is stuck in the bottom of an orange portal, while the top emerges through the blue portal. Just like other DIY Christmas decorations like Die Hard’s John McClane stuck in a vent, this kicked off a new trend, so here’s how to create a Portal Christmas tree. More detailed information can be found at Instructables.com.
To start out you will need the following:
Fake Christmas Tree
Adhesive Hooks
Two Rope Lights (Ideally blue and orange)
Scotch Tape
Tinfoil
Extension cords
Fishing line
Wire
Fake Garland (Optional)
If hanging one part of the tree from the ceiling make sure to tie the branches down with fishing line.
Measure out the rope light diameter for both sections of the tree and scotch tape together.
Cut two circles of tinfoil and place behind the rope lights to help create a feeling of open portal.
Attach blue rope light to the ceiling using adhesive hooks. Make sure to fasten securely and place in a position that makes it easy to use power cord.
Secure the top half to the middle of the ring using an adhesive hook. For added effect add fake garland to ring to create a further illusion of depth.
Stand the bottom half of the tree.
Any fans attempting the Portal Christmas tree may have to get a little creative with the steps when it comes to making it appear seamless. If attaching the top part to the ceiling is too difficult or impractical, it can also be attached to the floor to make things a little easier. Make sure to decorate it to complete the effect, though if the top part of the tree is on the ceiling, try to use light decorations to avoid unbalancing it.
The Portal Christmas tree takes a little bit of work to put together but the effort is worth it. For those who want to get even more creative, maybe add a few Companion Cube decorations to the tree too,