Gmail users can utilize the email service’s filter feature to direct incoming messages to certain areas of the platform and maintain a modicum of organization in their inbox. By fiddling with their inbox’s built-in search options, people can do things like apply labels and assign categories to email messages coming from a certain sender. They can also streamline practical functions such as skipping the inbox or auto-sending junk mail to the spam folder.
Gmail is one of Google’s most popular services, and the company has done a pretty good job providing useful upgrades to its mobile apps. There are currently many features in place that allow users to customize how the app’s interface looks to make it easier for certain individuals to navigate the platform. For instance, there’s a setting that changes the inbox’s density to something more readable and easier on the eyes. Furthermore, users can also tweak certain Gmail app options to automate important mail actions, like making ‘reply all’ the default setting when sending emails.
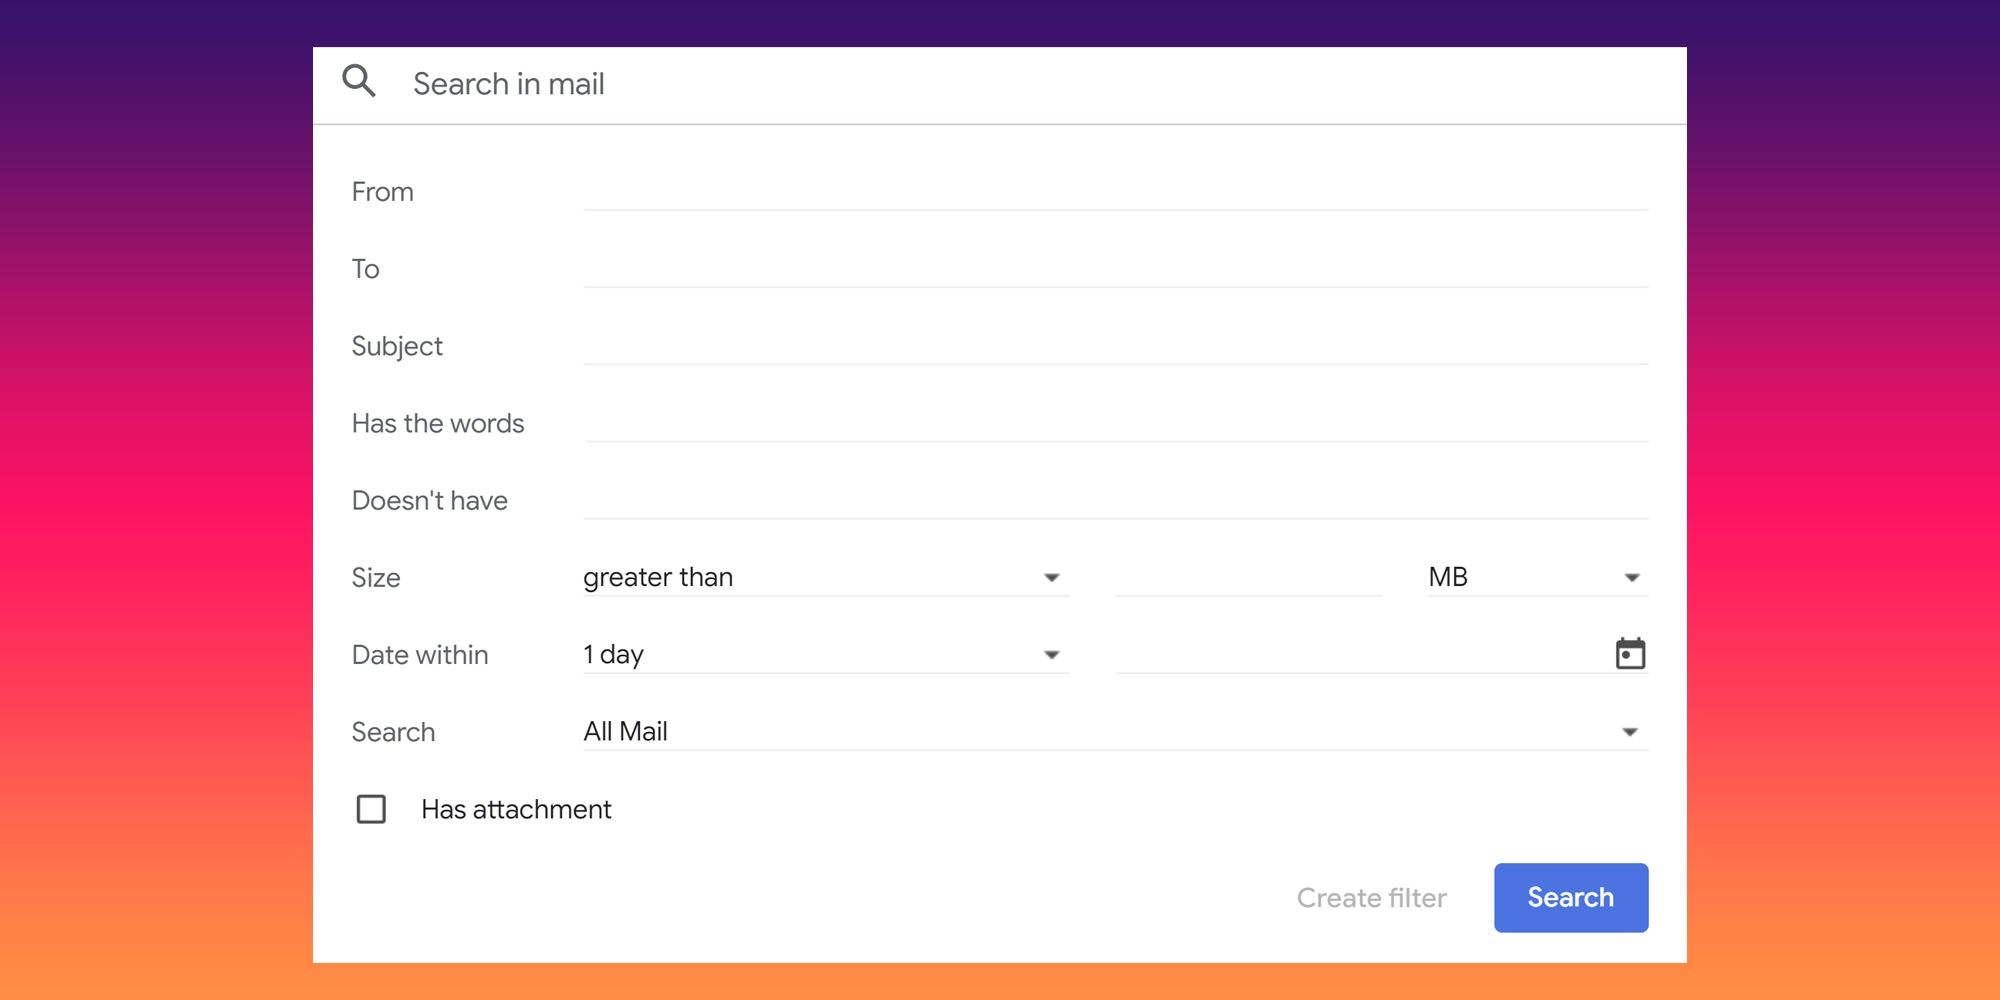
Gmail filters are another method for turning a person’s inbox into a well-oiled machine. Users can only create a filter by accessing Gmail through a desktop web browser. The quickest way is through the Search function — navigate to the ‘Search in mail‘ box at the top of the page and hit the ‘Show search options‘ button. Next, think of a filter indicator that’ll be useful for the type of messages that go into the Gmail inbox. For example, to look up email messages from a specific sender, type the email address into Search’s ‘From‘ field. To identify certain Gmail messages from a sender that normally uses the same subject line, type the keywords into the ‘Subject‘ or ‘Has the words‘ field. Hit the ‘Search‘ button to check if the criteria used yields the correct results. Hit the ‘Show search options‘ button again and click ‘Create filter.‘ Select the action to execute — some useful examples include ‘Mark as read‘ for messages to keep but not necessarily to read instantly, ‘Apply the label:‘ for important emails that need to be filed and easily accessed as a group, or ‘Delete it‘ for subscription emails and other junk messages — then click ‘Create filter‘ again to finalize.
Picking Gmail Search Criteria For Filters
Another way to create a filter is by using a particular message as a basis. While scrolling through the main Gmail inbox, click on the checkbox next to the email to use as a guide. Go to ‘More‘ (three-dot icon) located on the feed’s toolbar and choose ‘Filter messages like these.‘ This should trigger an automatic Gmail search with a generated filter criteria already in one of the available fields. If everything looks okay in the search results, click ‘Create filter,‘ choose a mail action to apply, then hit ‘Create filter‘ again.
When Gmail’s search bar is expanded, there are a total of nine potential parameters to use to fine-tune results. To get started, here are a couple of suggestions on how to use some available choices to automate certain mail actions on affected messages. Under ‘From’ and ‘To,’ input colleagues’ email addresses to isolate work-related messages, then ‘Apply the Label: (Company Name),‘ ‘Always mark it as important,‘ and ‘Never send it to Spam.‘ Users can also use these fields to filter messages from favorite vendors — such as ‘[email protected]’ — and automatically ‘Mark as read,‘ ‘Categorize as: Promotions,‘ ‘Skip the Inbox (Archive it),‘ or ‘Delete it.‘ Next, use the fields ‘Subject’ or ‘Has the words’ to group together messages talking about a certain topic, like ‘job application,‘ then ‘Apply the Label: ‘Job Hunt,’ ‘Star it,‘ and ‘Never send it to Spam‘ to make it easier to see all pending applications at once. Finally, consider checking the box for ‘Has attachment‘ and applying the label ‘Consider Deleting When No Longer Needed’ to earmark files that may take up valuable Gmail storage space. To apply chosen mail actions to messages in the search results, check the box for ‘Also apply filter to [x] matching conversations‘ before hitting the ‘Create filter‘ button.
In addition to the search bar, Gmail users can also create a filter as well as view all previously created filters through the platform’s settings page. Click ‘Settings‘ (gear icon) in the top-right corner of the screen and under ‘Quick settings‘, go to ‘See all settings‘. Hit the ‘Filters and Blocked Addresses‘ tab. While on this Gmail settings page, apart from being able to rig a message filter, people can also edit or delete already existing ones.